For this evaluation task, I will be looking at several different aspects of the clip, such as continuity, to see my performance as a team member and where I should make improvements to better my future projects.
Continuity is shown well in our piece through match-on-action and the fluidity of it. As an audience, you can tell what’s going on and it doesn’t jump between shots (or jump cuts) as seen with discontinuous film. The whole piece flows and it’s clear what’s going on. We also altered the levels of sound and lighting in the piece as some recordings were louder than others and different camera positioning meant that the lighting in certain shots differed. Correcting this made the film more continuous and more professional.
This is one of the match-on-actions used to demonstrate continuity in our piece:
 |
| Match-on-action (before) |
 |
| Match-on-action (after) |
All the exam board criteria has been demonstrated. Match-on-action was shown through two door openings and shot-reverse-shot and the 180 degree rule were displayed in the conversation scene. These editing techniques are vital to ensure continuity, make the film look more professional and to allow the audience to understand the message of the piece. Match-on-action is part of continuos film and without this (except when used for a desired effect), the audience can become confused, aware that they’re watching a film and reduces the amount of professionalism. Shot-reverse-shot is key for showing reactions, facial expressions and body language in conversational scenes. It allows the audience to understand the moods of the characters and their personalities. Finally, the 180 degree rule prevents the audience from becoming disorientated and allows them to understand the blocking of the scene; jumping the cameras around and ignoring this rule can be confusing and the clip will become discontinuous.
This is the second use of match-on-action in our piece:
 |
| Match-on-action (before) |
 |
| Match-on-action (after) |
The conversational scene demonstrates shot-reverse-shot using the 180 degree rule:
 |
| Shot |
 |
| Reverse |
 |
| Shot |
As a group we worked together well, spreading all responsibilities fairly evenly. Everyone put in ideas and suggestions when planning and creating the storyboard and script to ensure we were ready to film as quickly as possible. Whilst filming, we helped each other with equipment, camera angles and used good communication to get the task done as quickly as possible. There was little disagreement between us during filming and editing which made the whole process easier to complete. However, occasional absences from group members meant that the rest had to continue alone and hope that the other team member would agree with the progress made.
If we were to do this again, we would improve on the message of our piece. During the final stages of production our ideas became to change and we weren’t clear ourselves of how the piece should end and whether it would make sense. Due to interruptions, filming was cut short and we missed the last few shots causing our piece to lose meaning when we thought it wouldn’t. Because of this, the audience couldn’t understand whether the film was a dream or advert though it was both. In the future, we shall manage our time more efficiently and check that there will be no disturbances before we start filming. We will also try to ensure the frame has all the objects/persons needed as in some shots heads were cut off at the top due to a lack of space. As well as the framing, we will also look at mise-en-scene. We were limited to filming inside the school and so it was difficult to find a location suitable for our film. Our location was the best it could be but in the future we will film outside of school to ensure our film is as professional as possible. Finally, we will address the sound effects. after entering the dark room, there is a shot of the man who is sitting patiently. There is a loud suspenseful sound effect which is cut short and this affects the mood of the scene and professionalism. This was due to our lack of experience with the Mac and to prevent this happening again, we will practice in our own time.
After this moment in the piece, the following was supposed to be after but was not recorded due to interruptions:
 |
| The boy screams |
 |
| 'long shot of boy laying down and waking up' |
 |
| 'boy wakes laying on sofa, close up' |
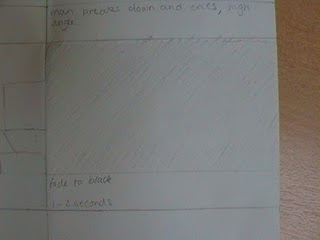 |
| 'fade to black' |
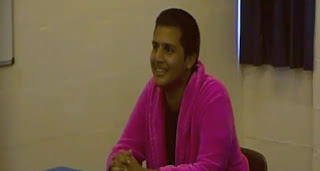
This is an example where the whole character was not captured in the frame and evidence of the school location:

Finally, in this shot there is a loud sound effect that cuts abruptly when moving cutting into the next frame:

Our idea was well thought out and we ensured that our planning was completed properly before filming began. When we first started producing ideas, we scanned the school and looked for suitable locations that would emphasise the message of our film, helping us to create the storyboard. We also planned how long the shots should last, where the sound effects should go and a rough idea of what the characters will do. This saved a lot of time as we were able to go from one shot to the next without worrying where to put the cameras and where to film. The script also reduced the amount of time spent on directing the actors of what they needed to do and where to stand.
Only two transitionswere used in our piece: at the beginning to remove the razor cut from a long shot to backwards tracking and fade to black at the end of the film. As there was a slight jump here between the long shot and backwards tracking shot, adding this effect created professionalism and ensured that there was still continuity. We used transitions sparingly and selectively as we wanted our film to look as professional as possible.
This is the dissolve transition used 20 seconds into our film:
This is the dissolve transition used 20 seconds into our film:
| Long Shot |
| Dissolve |
| Backwards Tracking |
Fade to black was used at the end of our film to create the desired effect and make it seem like an advert, as fade to black is a common trait of film trailers:
 |
| Final shot before 'fade to black' |
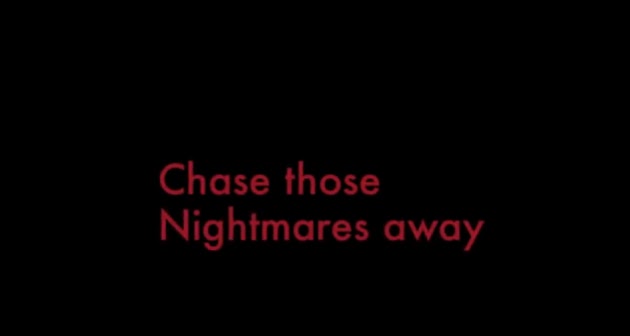 |
| Shot after 'fade to black' |
Though I have a Mac at home with the editing software, I still went to the editing session with the others to see if there was anything else I could learn to help me build on what I already knew. I was already aware of the basics of uploading the footage, selecting bits to use, adding transitions, credits and sound effects. I also knew how to steady footage and remove shaking (though it was not necessary for this task) and manipulate the volume levels and lighting. I learned how to crop shots and adding black, still frames, reinstating techniques I had forgotten. This experience put my skills to the test by teaching others and creating more of an understanding of the programme for myself. I learned to adjust the viewing of the raw footage from 5 seconds to 2, for example, allowing us to be more particular of which bits of film to use and which editing techniques would make our piece original and which wouldn’t. After this task, I feel more confident with the iMovie programme and will continue to use the skills I have learned for future projects.
From the process of this preliminary task, I have learned that the better quality equipment (in both filming and editing) the more likely the film is going to look professional. However, I also learned that it is not just quality of the equipment but the quality of the shots and editing, including mise-en-scene and continuity. Creating this short piece has shown me that this will probably not be the end of technological advances and as media becomes more popular, the industry will grow. Technological advances are important in modern day society to give an audience the best possible media experiences, whether it be in film, television or industries such as radio and magazines.